Learn the basic path from a blank page to a saved shamisen score: choose your
setup, enter notes, shape the music, listen back, and prepare the page for
sharing or printing.
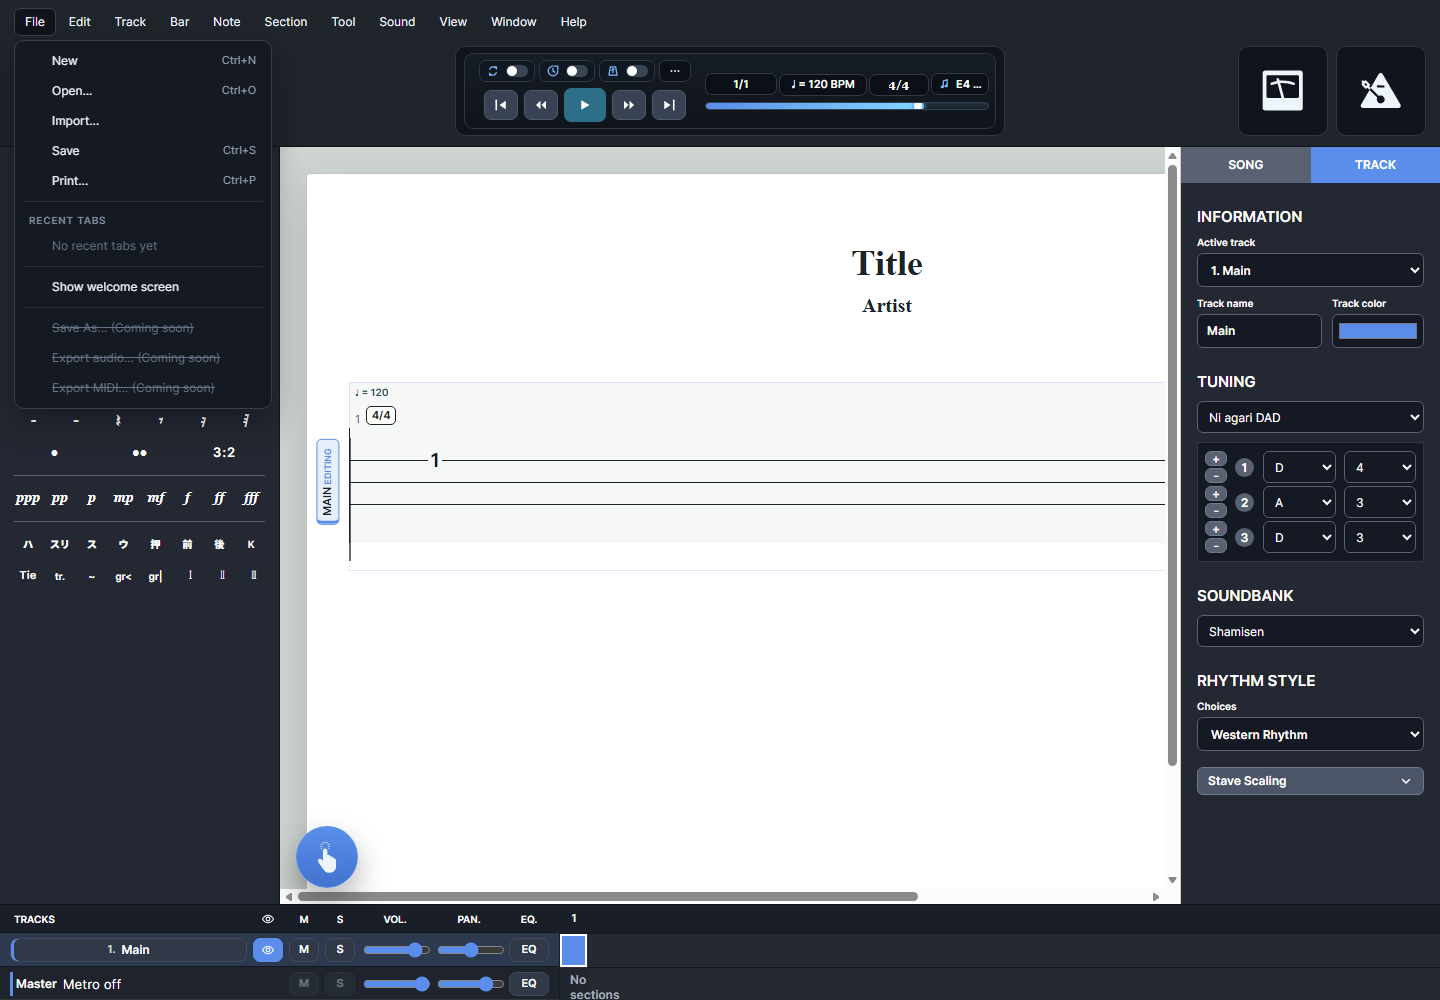
ShamiTab opens with three main choices. Use New when you want
a fresh score, Open when you already have a saved ShamiTab
project file, and Import when you want to bring in material
from Guitar Pro, MusicXML, MXL, or MIDI.
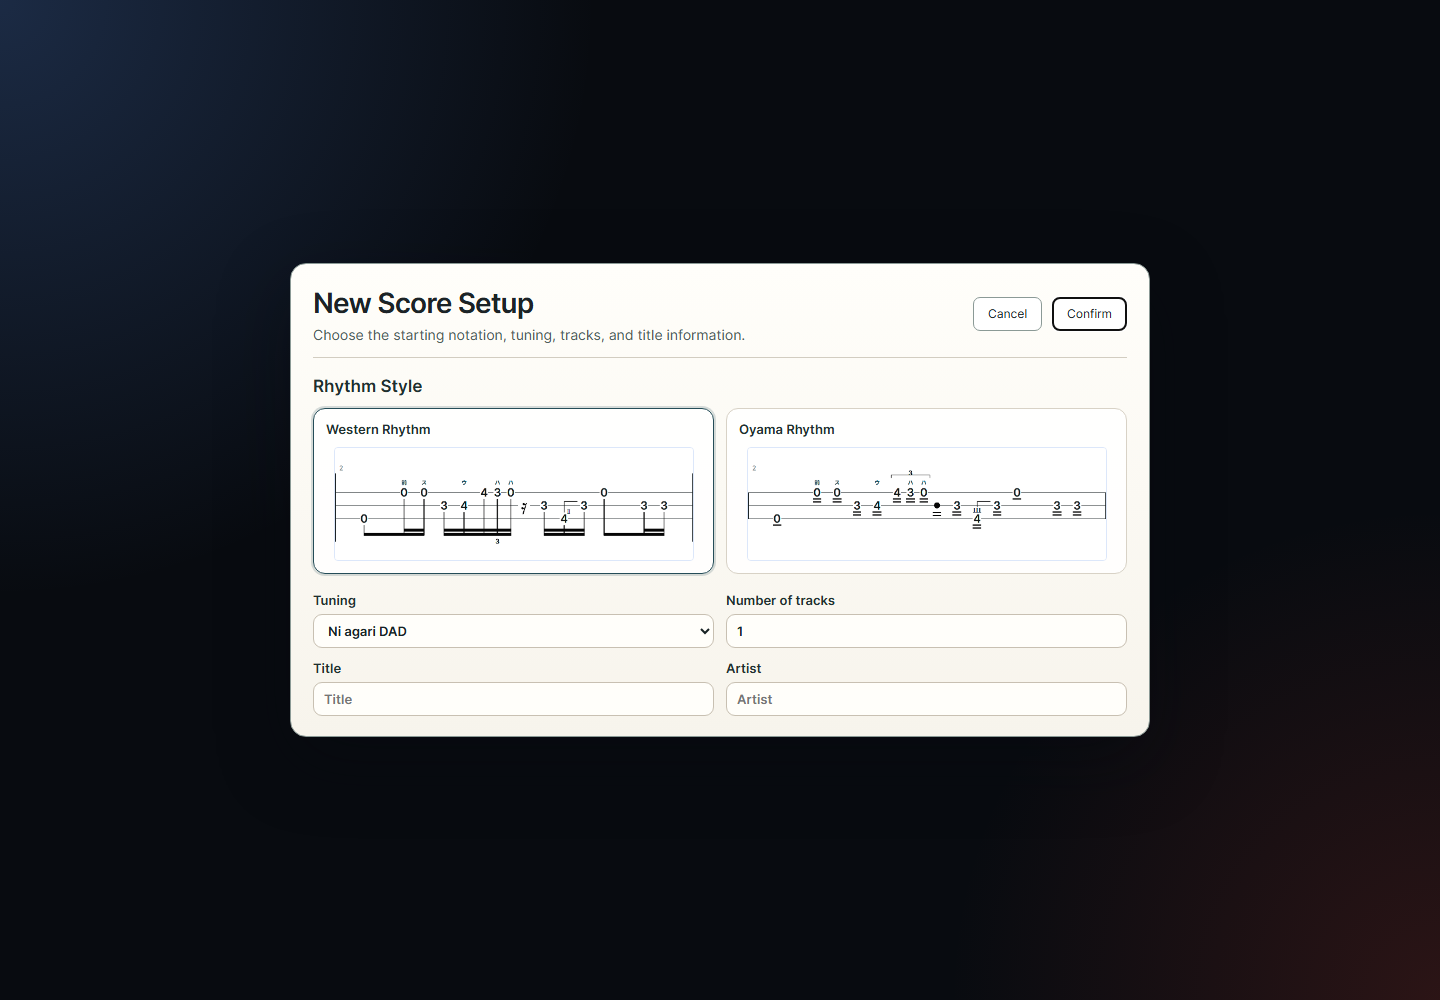
1. Create the score setup
The New Score Setup window decides the starting shape of the score. Pick
Western Rhythm for familiar stems and beams, or Oyama Rhythm for the
shamisen-specific flag style. Choose the tuning, number of tracks, title,
and artist before confirming.
Set rhythm style, tuning, track count, title, and artist before the score opens.
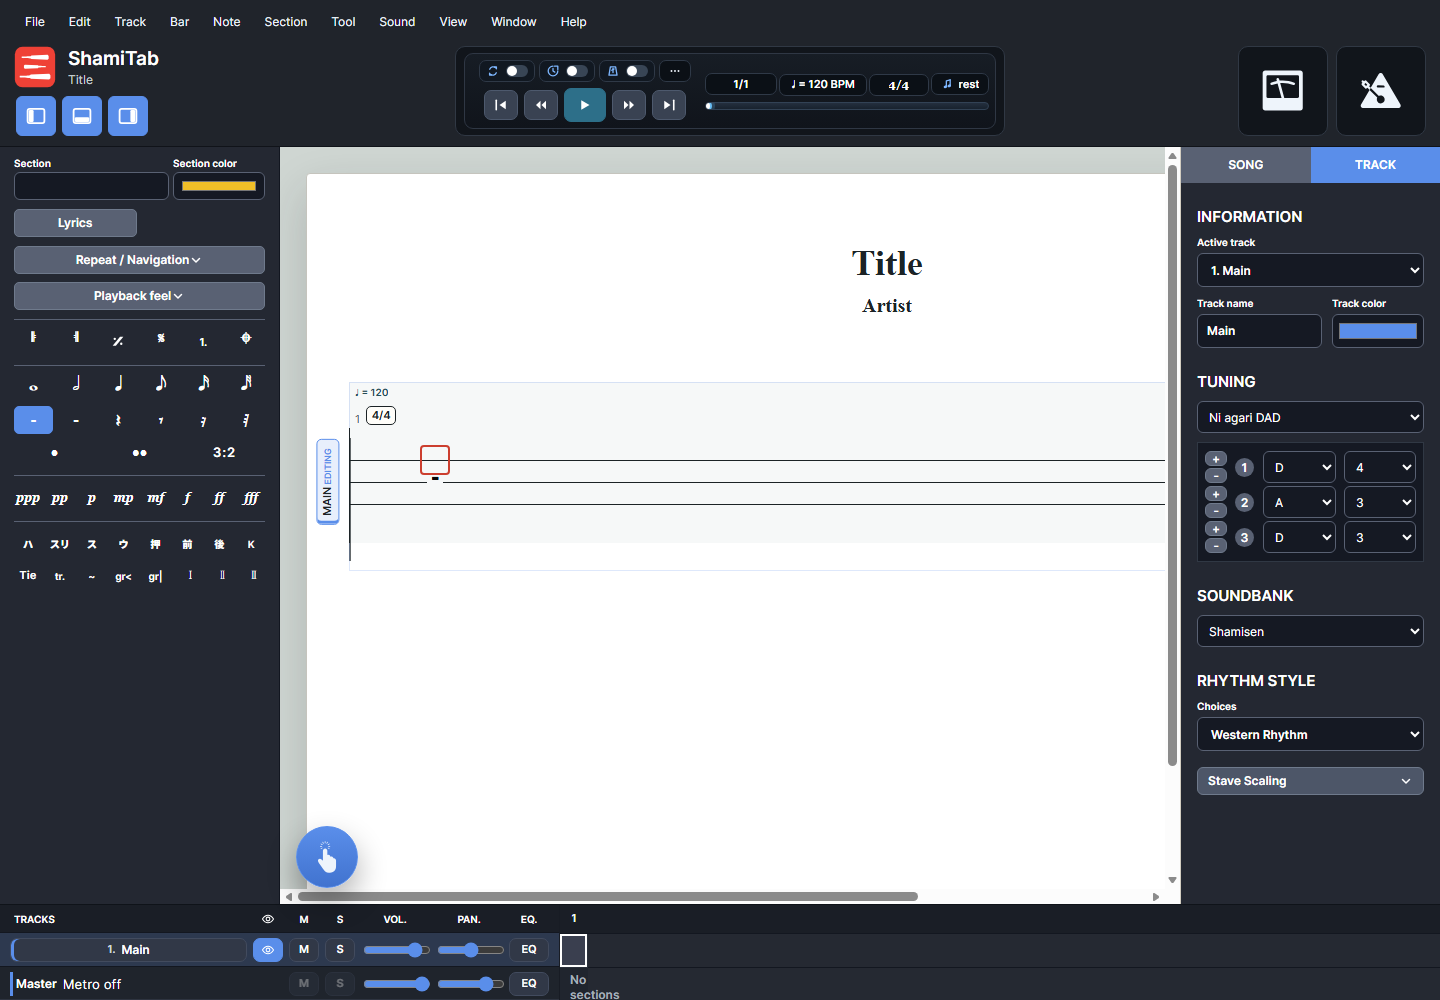
2. Learn the workspace
The score surface is the white page in the center. The top bar handles
playback, tempo, meter, view mode, and zoom. The left palette adds lyrics,
repeats, dynamics, techniques, and notation symbols. The right inspector
edits song and track settings. The bottom toolbar manages tracks, mixer
controls, and measure navigation.
The main editor keeps writing tools around the score so you can edit and listen without leaving the page.
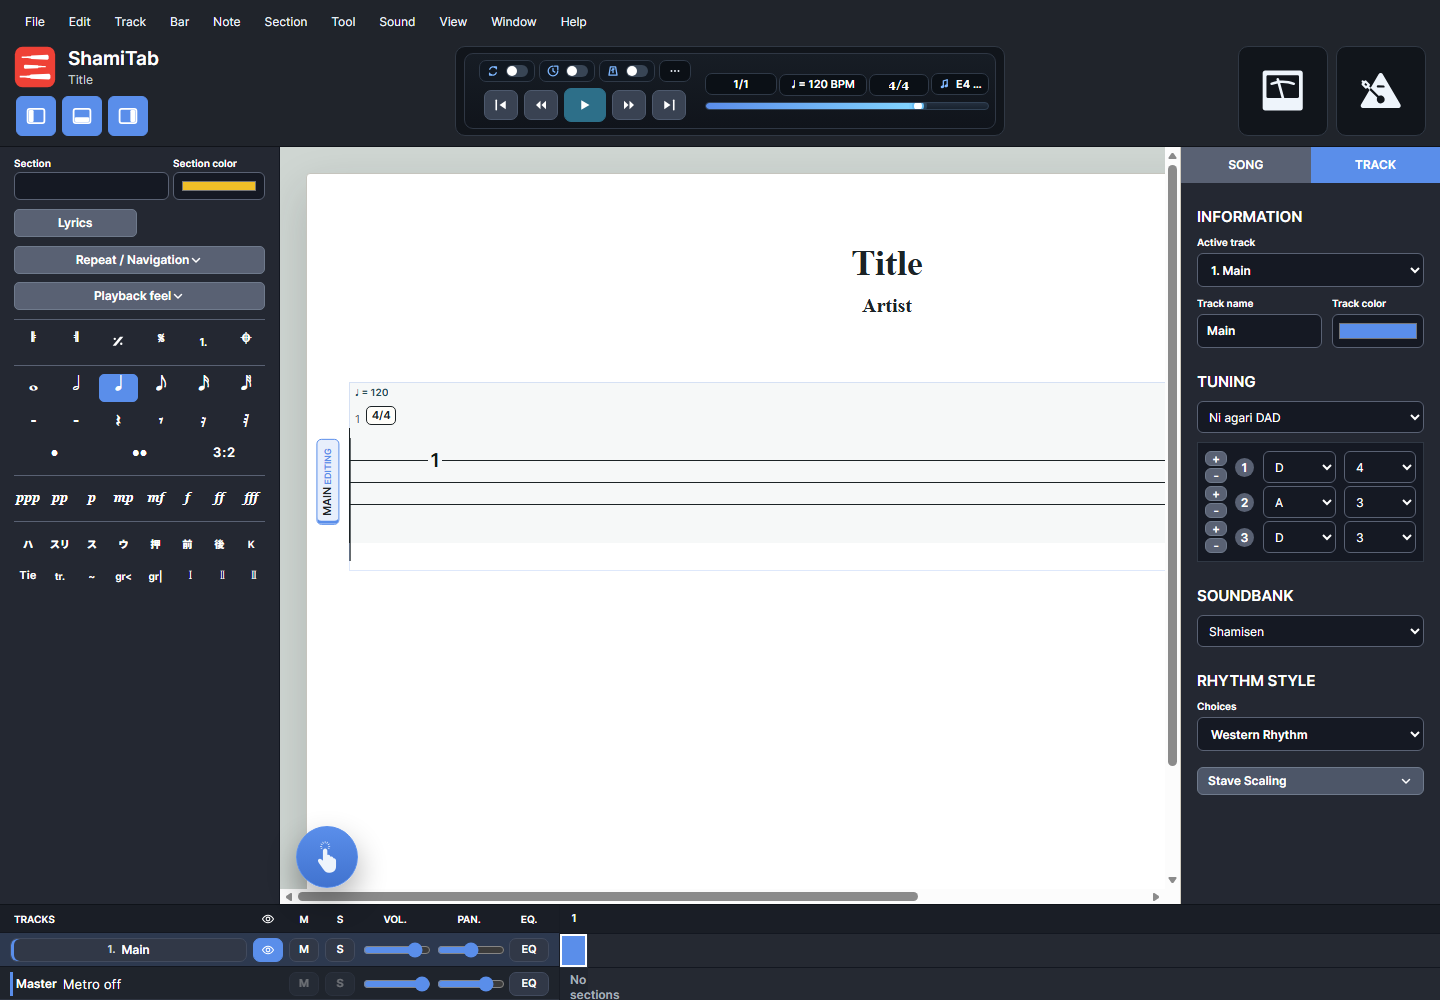
3. Enter your first notes
Click the score, choose a duration, then type a shamisen position number.
The musical cursor marks where the next entry will go. Use arrow keys to
move around, Tab to advance, number keys for positions,
and the rest button or rest shortcut when a beat should be silent.
Choose a duration, place the cursor, then type fret or position numbers into the score.
4. Shape the music
Build the score in layers. Add bars as the piece grows, mark repeats and
sections, add lyrics when needed, and use comments for teaching notes or
arrangement reminders. Techniques, dynamics, finger markers, ties, grace
notes, triplets, and rests can be added from the menus, shortcut keys, or
the left tool palette.
5. Listen and adjust
Use the transport controls to play from the start, jump between bars, loop
a passage, or turn on count-in and metronome. The right inspector controls
tuning and soundbank choices. The bottom toolbar gives each track its own
visibility, mute, solo, volume, and pan controls.
6. Prepare output and save
Switch between Continuous, Page, and Horizontal views while editing. Use
zoom, line spacing, track layout, and page view to check the printed result.
When the score is ready, use File > Print for paper or
PDF output, and File > Save to download a ShamiTab
project file for later editing.
Use the File menu to save your editable project and print or export a page-ready version.
Core Concepts
Cursor
The cursor is the red entry box on the score. It shows the string and rhythmic position where the next note, rest, or edit will happen.
Bars and rhythm slots
Each bar is divided into rhythmic positions. Durations decide how much space a note or rest uses before the cursor advances.
Tracks
Tracks let you write separate shamisen parts. Each track can have its own name, color, sound, tuning view, volume, pan, mute, and solo state.
Rhythm styles
Western Rhythm uses standard stem and beam notation. Oyama Rhythm uses shamisen-focused flags, rest marks, and marker placement.
Song information
The Song tab in the right inspector holds title, artist, subtitle, album, words, music, transcriber, notice, and instructions.
Symbols and text
Lyrics, comments, dynamics, section names, repeat signs, techniques, and finger markers sit around the tablature to make the score readable.
Common Workflows
Write from scratch
Start with New, choose the rhythm style and tuning, then enter notes one bar at a time. Add repeats, sections, and comments after the basic notes are in place.
Import a starting point
Use Import to bring in Guitar Pro, MusicXML, MXL, or MIDI material. After import, check tuning, rhythm warnings, track choices, and layout before editing further.
Arrange multiple parts
Add or duplicate tracks from the Track menu. Use stacked track layout when you need to compare parts and single track layout when you want a cleaner writing view.
Add lyrics and teaching notes
Open Lyrics from the left palette for verse text. Use Note > Add Comment when you need an instruction above a specific note or bar.
Make it playable
Set tempo and meter from the transport area, choose a soundbank, adjust levels in the bottom toolbar, and loop hard passages while checking the notation.
Prepare for sharing
Use Page view to check spacing, then print or save as PDF from the browser print flow. Save a ShamiTab project file when you need to edit the score later.
Where To Find Tools
File
New, Open, Import, Save, Print, and the welcome screen.